Welcome to the Quilted Arts Studio blog. My name is Patti Buhler and I’m here to encourage you to use all those lovely paintstiks, dyes, inks and other art mediums you may have purchased. You’ll have the opportunity to become part of a virtual art quilt group with classes posted monthly. Complete the project and send photos to be posted or just lurk on the sidelines – either way I’m glad to have you. We all need a little art everyday.
Snow dyeing!!!
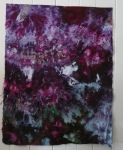
The upside of having a bunch of snow is the wonderful fabric you can make by snow dyeing. I followed the directions here – http://tinyurl.com/anx9o5w
You will need fabric – I used a pfd (prepared for dyeing) kona cotton, procion dye, soda ash, urea (optional), large tub(s), rack, plastic cups, utensils reserved for dyeing.
First soak the fabric in water with soda ash. I did as much as would fit in my bucket and soaked for 15-30 minutes.
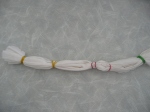
I’m dyeing in large plastic bins. I put fat quarters in the bottom of the bin. They will soak up the dye after it’s gone through the main piece of fabric. I did several different techniques to arrange the fabric for different dyeing results. (Click on the picture for a larger image)
- Traditional tye dye with rubber bands
- Scrunched up fabric with one rubber band around it to keep it “scrunchie”
- Rubber banded
- knotted
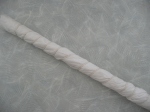
- One shibori technique – wrap the cloth around a pole – I use pvc pipe and wrap with a string.
- Then push the fabric towards the middle.
I put the rack on top of paper cups and then added the larger pieces of fabric. One I twisted and the other two I just bunched up.
Then pile on the snow! Put at least 3 inches over the top of the fabric.
Mix up the fabric dye according to directions. Using procion dye is more trouble but the results are worth it. The colors will be much brighter. Adding urea makes water wetter – fabric with urea water will take longer to dry. The longer the fabric is wet the more dye it can absorb. With procion dye the dye is not just coating the fibers but the little dye molecules are seeking out fabric molecules to bond to and the longer they have to “look around” the better. After making the dyes pour them over the snow. I used blue and yellow dye in one tub and blue and purple dye with a bit of yellow in the other. I don’t worry about what the final color will be I just hope for “happy accidents”!
I put one bin out in the garage and left one in the kitchen. As the snow melts the dye will hit the fabric at different times. Because of the time it takes for the snow to melt some of the dyes may separate into their component parts. Some dye colors strike faster than others (rush to hook up to the fibers) while the slower dyes will have fewer places to “hook up”. You’re never really sure what you’ll get until you’re done.
I let both containers sit over the weekend – I started the process Friday morning and took the fabric out on Monday. The snow melted in the one inside by Saturday morning. The one out in the garage took longer. After taking the fabric out rinse it until it the water runs clear. Then wash in hot water in Synthrapol. When the fabric hits the water all the little dye molecules that haven’t “hooked up” go looking – and usually end up on something white and cotton in your laundry. Using synthrapol is like putting all the single ladies on a bus and driving them out of town.
Once dry you finally know what your fabric looks like. Definitely liked the tub that stayed in the garage better.
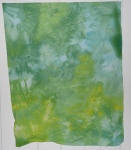
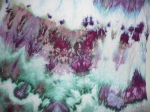
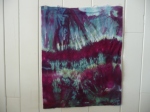
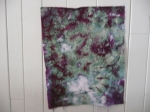
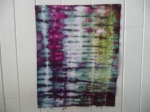
Here’s the results. I couldn’t have been more excited! Happy Snow Dyeing!!!
- Blue and Yellow tub kept inside
- Blue Yellow close up
- Shibori wrapped
- Purple Blue Tub, twisted, kept in garage
- Twisted close up
- Twisted Close Up
- Purple Blue Tub, scrunched, kept in garage
- Scrunched close up
- Scrunched close up
- Scrunched close up
- Knotted
- Tye dye
- Scrunched
- Rubber banded
Valentines for the Men in your Life!
This year I made 55 Valentines! There are so many beautiful Valentines for the women/girls in your life but what about the men? And boys? Here are some I came up with this year.
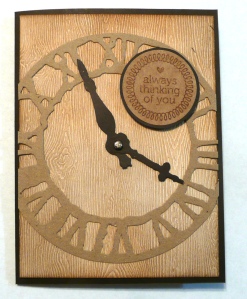
This used some elements from the January Simon Says Stamp card kit. I used the woodgrain paper and colored it with Antique Linen and Vintage Photo distress inks. I then cut the clock out of craft paper with dark brown paper for the hands. The die is Weathered Clock from the Tim Holtz Alterations by Sizzix. I stamped the sentiment included in the kit on a kraft paper sticker also included in the kit and mounted it on dark brown paper, cut around the sticker and adhered it with a pop dot.
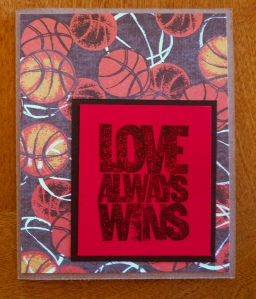
Here’s the card I made for the teens and tweens. I saw the Technique Tuesday stamp set “Love Always Wins” and realized it would be a perfect sentiment for the older boys on my list. I used paper from the SEI collection “All Star” for the background and stamped the sentiment on red paper. I mounted it on black and there you are. Inside I stamped the sentiment included in the set – “live in the moment, Love Life”. Perfect for boys!
Here’s the one for the little boys. Hearts were punched out from assorted Valentine papers – no pink! – using the heart shaped Martha Stewart punch. I used black wire from the jewelry department to fashion the antenna.
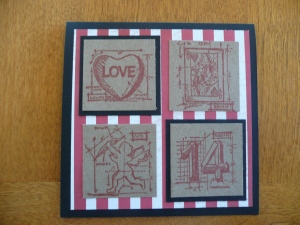
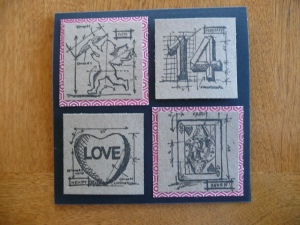
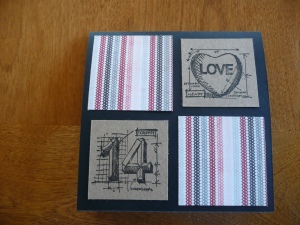
The last 4 are all based on the Mini Valentine Blueprint Stamps from Tim Holtz and Stampers Anonymous.
Happy Valentine’s Day!!!
Valentines!

I have a lot of grandkids…. a LOT of grandkids – 24 to be exact with 25, 26 and 27 on the way. I also LOVE making things for my grandkids although at this point it’s a bit like an assembly line. I found this idea for Valentines on Pinterest – my new favorite thing!
I used my Pazzles to make the front of the hearts. Besides cutting out the hearts I can use a pen tool to have the machine write. Easier than stamping, prettier than handwriting, especially if you’re a bit OCD – or CDO with all the letters being in alphabetical order, as they should be (joke also courtesy of Pinterest).
After writing and cutting the hearts out I then wrote the recipients name on the front and signed the back.

I took old crayons, took off the wrappers and melted them in the oven using a silicone heart baking pan. (300 degrees for 15 minutes) It took 4 crayons for each heart. When you take them out of the oventhey will look like a solid color but underneath they’re not so after the first batch I would take a knife and swirl the color a bit. Let them cool and pop them out.
Tie twine around the hearts, attach them to the card with a foam square and you’re ready to go. (I think this one looks like it’s from Twilight.)
Spring Classes – Get Ready to Buy a Longarm
If you’re thinking about buying a longarm this is the class you should take to help you make a decision. I know when I bought my machine I thought it would be like buying a sewing machine and heaven knows I’ve bought enough of those! Then I started looking and obsessing…. Which machine vibrated less? How did each one move? What about prices? Could I really do this? Didn’t even think about hydraulic lift and didn’t even look at the table or realize there were differences. This class will tell you about all the parts on a machine, discuss the differences between the tables they’re on and we’ll also discuss the realities of longarm quilting. I’m not affiliated with any machine company I just want you to be able to make an informed decision.
MQX – Saturday, April 14th – 9 – 12 am
Spring Classes – To Sell or Not to Sell – Retail Sales for Longarmers
We fall in love with fabric… We have our tax ID number…. Why not buy wholesale by the bolt? It’s so much cheaper and we can always sell the extra….
I have customers and they can’t find wide backs for their quilts….should I carry backings?
Carrying batting and thread are no brainers, aren’t they.
An internet store…. I can sell fabric in an internet store!
We all have these ideas and questions. Can you do sell retail and make a profit or is it a giant money pit? This class will tell you what you need to know to make a decision that’s right for you and profitable and legal!
MQX – Friday, April 13th, 4-6 pm
MQS – Friday, May 18th, 8-10 am
Spring Classes – The Sparkly Stuff
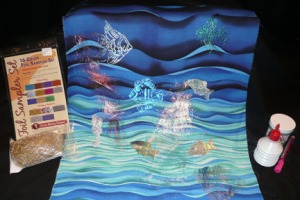
This is a hands-on class using foil and Angelina film and fiber. We’ll also be making our own screens so that we can screen print glue to use with the foil. We’ll use stencils and also the Slice Fabrique to create our shapes. Lots of interesting things going on in this class plus lots of supplies to take home!
MQS – Saturday, May 19th from 10:30 – 12:30
Spring Classes – Running with Scissors
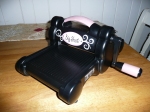
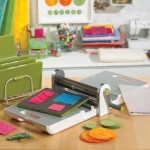
There are so many ways to cut fabric and so many new products to use! In this class I’ll start by giving tips and tricks for accurate cutting with rotary cutters and demonstrate some products for accurate cutting including the QuiltCut 2, ergonomic rotary cutters and True Cut rulers and rotary cutters. Then we’ll look at pressure cutters – Accuquilt GO and Sizzix Big Shot and Big Shot Pro. After that we’ll see how the electronic cutters work – Cricut and the Slice Fabrique. There will be time at the end of class to try them all out. With so many options come and see how they work and which tools would help you cut faster and more accurately.
MQX – Thursday, April 12th from 1-3 pm
MQS – Friday, May 18th from 1:30-3:30 pm
- Slice Fabrique
- Sizzix Big Shot
- Accuquilt GO!
- Big Shot Pro – Fabric Edition (Purple)
- True Cut Ruler and Cutter
- Cricut
Spring Classes – Easy Screen Printing
We had so much fun screen printing in our Art Quilt group that I’m very excited to bring this class to both MQX and MQS this spring. I thought screen printing needed expensive materials and was difficult to do but I found out that you can make your own screens with common materials and it was very easy. In the class we’ll be making two kinds of screens – one disposable and one reusable. We’ll experiment with different mediums to create the design – soy wax, glue, paste and freezer paper; and different mediums to print with – fabric paint, screenprinting ink, and shaving cream mixed with ink and discuss using dyes as the medium. You’ll go home with a screen and several printed fat quarters. Don’t settle for just the fabric you can find….make your own!
MQX – Wednesday, April 11th, 9-11 am. Sign up here: http://www.mqxshow.com/MQX/East/Home/index.cfm
MQS – Saturday, May 19th, 8-10 am. Sign up here: http://www.mqsshow.org/Registration/
Making the screens……..
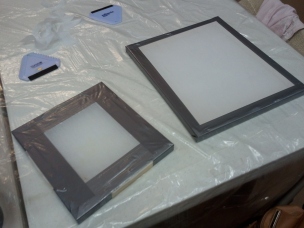
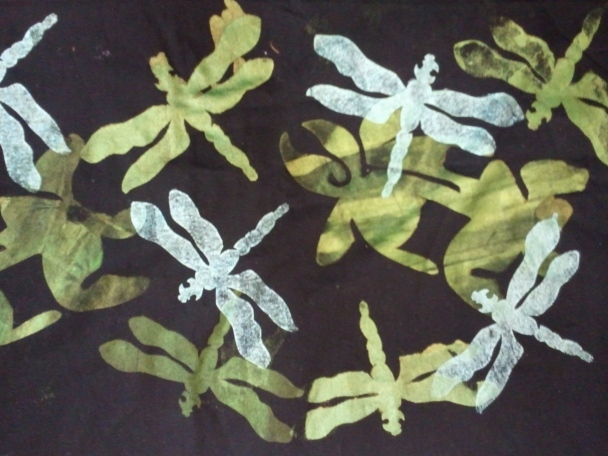
Ready to print – freezer paper butterflies cut with the Slice with soy wax swirls….
The finished fabric:
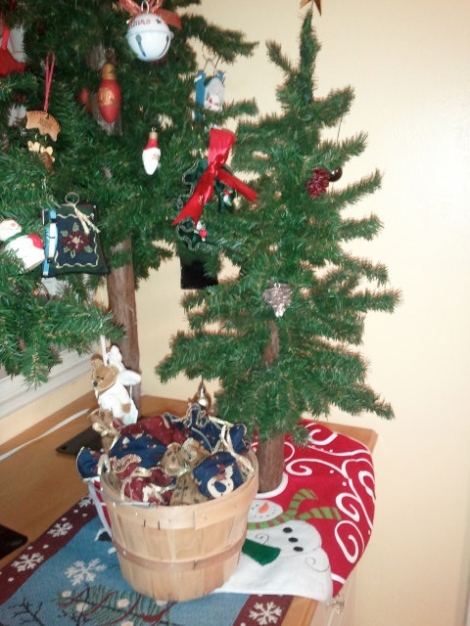 I’ve been trying to decide what to do for an advent calendar this year. I finally decided to get 25 small ornaments (on sale at Target..) and put one on a small tree each day until Christmas. I thought about putting the grandkids names on the ornaments but since grandchild 25 is due in March I was quickly running out of days until Christmas so I opted to put our children’s names plus mine and my husbands on the small ball. The other days would have the colored pinecone ornaments. I bought a small tree skirt at Hobby Lobby. Now I just needed something to put the ornaments in. I decided to make fabric bags for the ornaments using some Moda fabric. I used 4 fabrics – 6 inches by wof of the one for the numbers and 9 inches by wof of three others. You could also use 4 fat quarters.
 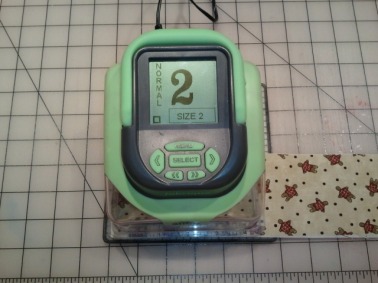 I cut out the numbers with my Slice Fabrique. This was my favorite part of the whole process and a big reason why I chose fabric bags – I wanted the excuse to cut something…Lots of something. I decided to use the numerals from the “Vintage Seasons” Fabrique card. Each numeral needs to be cut separately, but it didn’t take very long.
 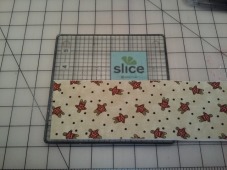 To use the Fabrique you use Slice temporary spray adhesive on a glass mat. Once your mat is sprayed it remains sticky for a long time. My mat was still sticky enough from the last time I cut that I didn’t need to re-spray it. I cut the fabric that I wanted to use for the numerals into two 3 inch strips. To use the Fabrique the fabric needs to have some type of paper on the back, either paper backed fusible or freezer paper. Since I wanted to be able to fuse the numerals on the fabric I used Wonder Under fusing it to the strips. I put the fused fabric on the sticky mat.
 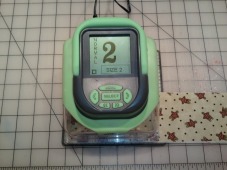 From the Vintage Seasons SD card I selected the numerals. I cut them all at the 1 size which gave me letters a bit over 1 inch tall. You can see the numeral on the Slice screen. (I took the pic after and didn’t see the size was 2 – I did cut mine on 1.) I cut all the “1”s first, then the “2”s, etc.
 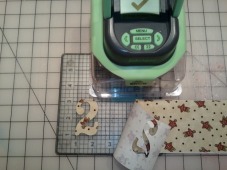 You can see the “2” in the picture to the left. It takes just seconds to cut so it goes quickly. After cutting I would move the fabric over and cut the next numeral.
  Then I made the fabric for the bags. I cut 9 inch strips from 3 fabric or if you’re using fat quarters cut the fat quarter into two 9 inch pieces. Then I serged both edges of the fabric using a rolled hem. I put gold metallic thread in the top looper and gold shiny polyester thread in the bottom looper with regular thread in the needle. Pairing poly thread with the metallic makes the sewing go easier. After serging all the long edges I cut them into 4 1/2 inch pieces so the finished pieces are 4 1/2 by 9 having the rolled hem on the 4 1/2 inch sides.
  Next I fused the numbers on the fabric. I found it was really easy to get the paper off the back of the numbers if I scored the paper with a pin before trying to remove it. I just folded the fabric so I could see where to put the numbers and ironed them on.
  Then it was back to the serger where I serged up the sides to make the bags. Fill and tie with ribbon and you’re done. I found a basket to put all the little bags in and my advent tree is ready. If you decided to do this project send pictures. I’d like to see what you come up with. Till next time……..
Advent Calendar
Finally another post……
Well, it’s been a long time since I’ve posted. Good intentions but life somehow gets in the way. So I’m making an early New Years resolution – to blog more in 2012………


