I’ve gotten into cutting lately.. appropriate cutting of non-living things. I’m probably attracted to it because there are tools
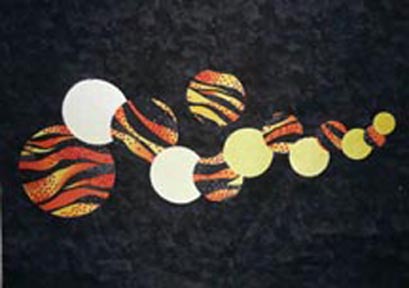
that make the job easier and I’m all about the tools. Both the quilt block to the left and the small quilt above were made with shapes cut from die cutting machines. They are quilts in progress, they’ve been fused, but not quilted.
I’m sure most of you have heard of the Accuquilt GO. Fewer of you have heard of Sizzix Big Shot since it comes from the scrapbooking world. (I’ve also “crossed over” into scrapbooking – it gives me more opportunity to cut things.)
The Big Shot (or the Big Kick – they’re the same basic machine) works much the same way as the GO. They use cutting dies that are sandwiched with fabric between two cutting plates and put through the machine with a crank. When the sandwich comes out the other side, voila! your fabric is cut. The upside to the Sizzix is it’s cost and the cost of the dies. The machine is around $100 but can be purchased with a coupon or online. The dies are $15 – $20 but can be bought with coupons or on sale.
For these projects I used dies from the GO, Sizzix and Spellbinders.
The Sizzix dies look like small GO dies with a black plastic base instead of green. They have blades inside of foam. When the rollar blades push the fabric into the die the fabric cuts. Even though they look the same size you cannot cut Sizzix dies in the GO, the Sizzix dies are too thick. And even though the Sizzix is 6 inches across you cannot cut GO dies in the Sizzix – they’re a bit too wide.
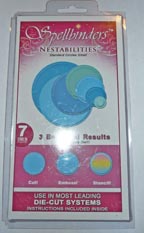
Spellbinders dies lack the foam. There very thin and can be nested for storage. You get several sizes of the shape in one package. They can be used with either the Sizzix or the GO.
Start by fusing your favorite fusible to the wrong side of your fabric. This way you can iron your pieces down when your finished. If you prefer to sew them down you can leave off the fusible but there will not be any extra on the shapes to be able to turn under the edges. I put parchment paper down on my ironing board then put down the fusible and then the fabric. A quick press adheared the fabric and it pulled right off the paper. Be sure and check the directions for your particular fusible. To cut with the Sizzix die you make a sandwich: from bottom – cutting plate, sizzix die, fabric – right side down, cutting plate. Place the sandwich into the Sizzix and turn the handle. It’s helpful if all the layers are not exactly even with each other, it will go into the machine easier. You may also need to put a bit of pressure on top of the sandwich or give it a little push. It should be a bit hard to go through but not too hard. If it doesn’t cut well your sandwich may not be thick enough. Add a piece of paper or cardboard under the die as a shim until you get a good cut. If you’re cutting with the GO the sandwich consists of, from bottom – cutting die, fabric, cutting mat.
To use the Spellbinder dies place the die on the multipurpose platform, then the fused fabric, then both of the cutting plates. You can also place them on the multipurpose platform and add one of the cutting mats and run them through the GO cutter. I like experimenting with the Spellbinder dies because you can get so many options with the shapes. You can nest the shapes so that you can cut rings and skew the inside die for “warped” shapes.
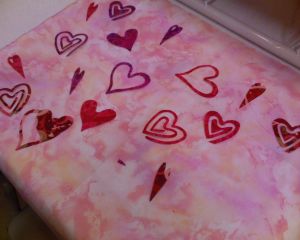
Once your shapes are cut arrange them on your fabric. You may want to press guide lines or make marks (only if they’ll come out after being ironed – check first) to help with the placement. Once your design is the way you want it fuse it down following the instructions on your fusible.
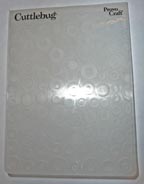
I’ve also been experimenting with texturizing fabric. In “Planets Collide” I texturized some of the circles before fusing them I used the Cuttlebug embossing folders to do this.
The folders have a pattern that sticks out on one side and is indented on the other. To use them you put the paper in the folder and run it through the Sizzix using the multipurpose platform and both cutting plates. When you open up the folder the paper has been pushed into shape. It works well with fabric, the trick is to be able to keep the texture, especially when you need to iron it down. I’ve been experimenting and have had some success by using stiffening liquid. Take a piece of wax paper. Place the fabric on it and brush on the stiffening liquid until it’s soaked. Fold the wax paper over the fabric, place in the folder and run through the machine. When it’s out unfold the top layer of wax paper. Let the fabric dry then peel it off the paper. This wouldn’t stand up to washing and there’s some problems with getting the fusible to stay on but it did iron on. If anyone has any thoughts on this I’d be happy to hear them.
I recently attended CHA (Crafts and Hobby Association) Show. I am so excited about a product I saw there. Recently Sizzix has come out with a 12″ cutter called the Big Shot Pro. The Big Shot Pro works with a tray system to hold the dies like the Accuquilt Studio. I had wondered if it would take the GO dies and had taken one with me for a test run. Not only does it take the GO dies, except for the long strip cutters, they told me it will also take the Accuquilt Studio dies, again, except for the long strip cutters because the tray is not long enough. The exciting news is that Sizzix will be producing the machine as a fabric cutter and will be coming out with quilting dies. The quilting machine will have a larger tray to hold the longer dies and will work with all the Accuquilt GO and Studio dies. They are coming out with dies for it and also …..drumroll….. they are coming out with quilting dies that will work with the regular Sizzix! Yes, the little, well under $100, cutter! They’ll have basic shape applique dies as well as a long die of triangles and a long strip die. You will need to buy long cutting plates to work with the dies. The cutter and dies should be out at spring market although I’m hoping I can get a hold of some to have at HMQS and MQS.
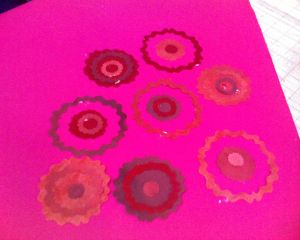
Here’s what some of our class members came up with – remember these are works in progress:
Next month: Painting sunrises and sunsets with Tsukineko Inks.
I’d love to hear your comments on this project. If you’d like to try some die cuts without purchasing a machine I’ll have kits for both the Flower Quilt Block and Planets Collide on my site – http://www.QuiltedArtsStudio.com soon.
See you next month!
-I’ve tried many times to format this so I wouldn’t have words hanging in between the pictures or sentences broken up in the middle but it eludes me. I guess what I see when I edit is larger than the space it fits into. Anyone with any suggestions email me 🙂






Hey Patti!
Great work! I am glad to see how much fun you are having with your dies! I love seeing happy satisfied artistic creative customers!
Keep it up!
Jessica @ Sizzix
Hi,
Just wanted to say a big thank you for this excellent article. I have just purchased the bigshot express and as a quilter I want it for the amazing shapes I can get with the dutting dies for applipes ets… I have been trying to find the information you so kindly shared or ages and can now go ahead and purchase the Spellbinder dies that I like the look off as before reading this I didn’t know it they would work or not…
so thanks
Lily